Saturday 31 August 2013

Cajun-style Spicy Pickled Quail Eggs


You are probably wondering why on earth am I making pickled quail eggs again after my not so successful attempt here. Well, you know me. I don't know when to give up :)


I searched the internet again for another recipe and found Cajun-style Spicy Pickled Quail Eggs. I had to give these pickled eggs another go before deciding if it was good or not. This time round some of the ingredients were slightly different. Rice vinegar is used instead of white wine vinegar. And then there is coriander seeds, chili flakes and cane syrup. Other common ingredients are whole peppercorns, allspice berries and of course, salt.


I had all the ingredients except for cane syrup, allspice berries and chilli flakes. So I had to improvise again and substituted with honey, fennel seeds and sweet paprika. The smell of the pickling liquid this time round was much better, vinegary with hints of the aromatic bay leaves and spices.


I boiled 30 quails eggs but 4 were unusable because I exposed the yolks accidentally while peeling. But they were not wasted, they went straight into my mouth :) 

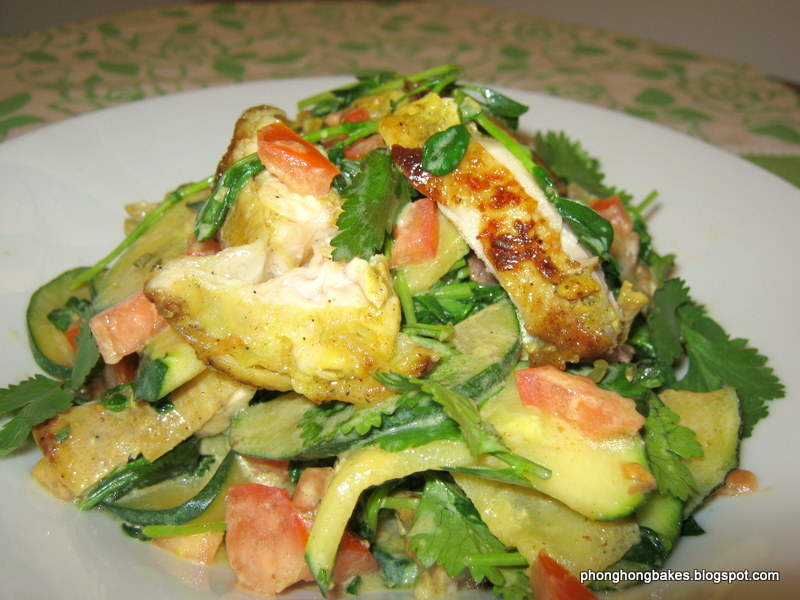
Since the Egg theme on LTU will end today, I am tasting the eggs one week shy of the recommended pickling time. Hmmm.....not bad, way better than the first recipe. I wish that the spices had a stronger aroma, maybe my spices were not so fresh when I used them. I believe with a bit of tweaking, this recipe could work for me. Next time, I will make sure that my spices are fresh so that they would exude  a stronger aroma and I would add more honey to lessen the tartness of the vinegar. These pickled eggs would be a good addition to my salad. No waste this time. I am eating the pickled eggs!


Cajun-stye Spicy Pickled Quail Eggs
Recipe source : Green Basket
(My adaptations and notes in red)

Ingredients :
- 2 dozen quail eggs, at least a week old (this is to make sure it is easier to peel)
- 1.5 cups rice vinegar
- 1/4 cup water
- 2 tsp cane syrup (I replaced with honey)
- 1 tablespoon whole peppercorns
- 1 teaspoon whole allspice berries (I replaced with fennel seeds)
- 2 bay leaves
- 1 tsp chilli flakes (I replaced with 1 teaspoon sweet paprika)
- 1/2 teaspoon coriander seeds
- scant teaspoon salt

Method :
1. Sterilize a pint jar (I used 2 old St Dalfour jam jars)
2. Put eggs in a pan, cover with water. Bring to a slow boil, turn off and plunge them in ice water. If you cook the eggs too "hard" they'll get rubbery in the brine. As soon as they're cool enough to handle, peel them carefully and set aside to cool and dry. (I simmered the eggs for about 5 minutes)
3. Combine rice vinegar, spices and salt in a small pan and bring to a furious boil. Set aside and let cool.
4. Carefully pack the eggs in the clean jar. They won't quite fill up.
5. Strain the brine and take out the bay leaves and coriander seeds and carefully poke them down among the eggs with a chopstick. Be careful not to break the eggs or the exposed yolk will make the brine murky.
6. Then pour the brine over until the eggs are completely covered, and finally scatter the remaining spices from the brine over the eggs with a spoon.
7. Cap the jar tightly and gently shake to make sure tthe spices are distributed evenly.
8. Store in the fridge for two weeks before serving.

Photobucket

This post is linked to the event, Little Thumbs Up organised by Zoe of Bake for Happy Kids and Doreen of My Little Favourite DIY and hosted by Baby Sumo of Eat Your Heart Out.

Friday 30 August 2013

Pickled Quails Eggs


When I was a little girl, I was fascinated with quails eggs. To me, they were baby eggs and I was always delighted if I found them in any dish. They have a distinct taste and are very tasty.

When I bought the book Your Cooking Questions Answered, I was very curious when I saw this recipe. Pickled Quails Eggs was suggested as a Christmas gift. I looked at the pickling ingredients and some of them are not what I readily have in my pantry like mace and yellow mustards.

Pickling liquid.
I did a search on the internet and found other variation to the recipe. Some use whole allspice, bay leaves and tarragon. I did not want to go and get these ingredients as I may not use them again. For the sake of satisfying my curiosity about pickled eggs, I decided to improvise by adding whatever ingredients that I had on hand.


When I boiled the pickling liquid, it was quite fragrant initially due to the orange zest. But after a while, it smelled strange. Reminded me of dettol soap, yikes! I used 30 quails eggs and they fit perfectly into the bottle. After pouring in the pickling liquid, I still had some leftover. Not wanting to waste, I decided to boil 3 chicken eggs and pickle them too.


The pickled eggs looked rather attractive in the bottles. One week later, it was time to taste. I tried the quails eggs. The texture of the egg was rubbery. It was sour and salty with a strong and not so pleasant orangey aroma. I can't say that it was bad but at the same time I wasn't thrilled by the taste either. Perhaps, this is due to me substituting the ingredients or this pickle is an acquired taste. Pretty much like century eggs, some people find it disgusting while other like me have no problem gobbling them up.


I was thinking maybe the pickled eggs would go well in a salad or eaten with another dish. They might be nice as part of a sandwich. I did try them in my sandwich but unfortunately, that spoiled my sandwich :( I have kept the eggs in the fridge after opening the bottle. The recipe says it is best to use them within a month. But they have all gone into my compost bin. Try at your own risk.


Pickled Quails Eggs
Recipe source : Your Cooking Questions Answered (page 269)
(My notes and adaptations in red)

Ingredients :
- 1 teaspoon whole mixed peppercorns (I used black, white and Szechuan)
- 2 dried red chillies
- Small piece fresh ginger, peeled and finely chopped
- 1 blade mace (I replaced with a bay leaf)
- A pared strip of orange zest
- 1 teaspoon yellow mustard (I used black mustard)
- 1 teaspoon sea salt
- 600ml white wine vinegar (I used distilled vinegar)
- 24 fresh quails eggs (I used 30)

Method :
1. Put all pickling ingredients except eggs into a pan.
2. Bring to a boil, then remove from heat and leave for at least 2 hours or until cold.
3. Hard boil the eggs for 3 minutes, plunge them into cold water and peel them when cool.
4. Pack the eggs into a sterilized jar.
5. Strain the spiced vinegar through muslin, then pour it over the eggs so that it covers them completely.
6. Seal with non-metallic vinegar-proof lids and store in a cool, dark place for a week before using.
7. It is best to use them within a month.


Photobucket

This post is linked to the event, Little Thumbs Up organised by Zoe of Bake for Happy Kids and Doreen of My Little Favourite DIY and hosted by Baby Sumo of Eat Your Heart Out


This post is also linked to Cook-Your-Books #3 hosted by Joyce of Kitchen Flavours.

Thursday 29 August 2013

Vegetable Fritters


Vegetables are good for our health but this is not the way to eat them :) I made these fritters on the spur of the moment just to use up the leftover vegetables that were sitting in the fridge (or maybe it's just an excuse). That's the problem with me, I sometimes buy too much.


The grated carrots in the plastic container would be good for another day or two and then there's the alfalfa sprouts that didn't make it into my salad. A bit of coriander leaves here and some long beans there and all these went into my mixing bowl.


Looks like I am making salad, but I'm not.
I added some minced onions, some chives from my garden, an egg, self-raising flour, seasoning, loads of pepper and water. No recipe, just chucking everything in and adjusting the flour and water as I went along. And I am now a pro at making vegetable fritters after making Corn and Vegetable Fritters


This time round, my fritters were even better, crispier and tastier. Oh, I love the crunch when I sank my teeth into the first one. Yums! I must have got about 12 to 15 (didn't count) fritters and of course I can't eat them all. The remainder went into the fridge and was reheated in the oven the next day. Fresh is always best but the reheated fritters were crispy and still tasted very good.


For the recipe, please refer here and feel free to make adjustments to suit the amount of your ingredients.


Monday 26 August 2013

Nutella Cake


Nigella Lawson. I tune in to her cooking shows just to look at her and to listen to her talk. And of course for whatever dishes that she cooks or bakes. When you have a face like that, speak like that and cook and bake like that, what can I say except to agree that you are a domestic goddess. Nigella is not only gorgeous but she is oh so articulate. Just listen to her, how can you not pay attention? And she makes cooking and baking seem so simple, a blitz here and a plonk there and out comes this bedazzling dish. Haih! I am so impressed.


Ever since my love affair with Nutella began, I have been searching for more things to do with it other than taking clandestine scoops when no one is looking. I have found Nutella Cheesecake, Nutella Cookies and of course the delectable Nigella's Nutella Cake. I printed the recipe from nigella.com for the longest time but as is customary with me, I sat on it. 

A very thin slice for the cook to sample. The cake passed the test and my guests were duly served.
My parents came for a one week holiday and I hosted a family dinner at home last weekend. My beloved auntie is also back on holiday. So Phong Hong Bakes springs to action. I mean, got to maintain my reputation, mah! Or else my auntie will give me no peace. "She got food blog but we got nothing to eat!". Besides, I promised my auntie to bake some of the cakes I posted for her to sample.


Nigella says that this cake "Not only is one of the easiest cakes to make, it happens - joyously - to be one of the most delicious". Nutella and Nigella, I was sold! Besides, I still had 3/4 of a big jar of Nutella which wasn't moving. You know and I know how the 1/4 went missing :)

This cake is basically a flourless cake and uses ground hazelnuts. No sugar is added as Nutella is already sweet. The only hassle is egg separation. Nigella's recipe uses Frangelico which can be substituted with water or rum. I happen to have a bottle of rum on hand and that's what I used.

When mixing the batter, I was reminded of an earlier cake I attempted, Chocolatissimo. All went well except that when the cake was in the oven, the sides were done much faster than the middle. I baked the cake for 50 minutes, 10 minutes longer than recommended. The middle was nicely done but the sides seemed hard and dry. I was worried. Maybe the next time, I ought to adjust the oven temperature and baking time.


This cake was meant for dessert and if I messed up, it would be a disappointment. I had baked an Ogura Cheesecake early in the morning for my auntie and the cake tanked. It was 4:30 am and I read the recipe wrongly. Instead of 50ml of oil, I added 120ml (that was the milk!) and of course my cake came out extra moist! What a bummer!

In between shopping, cooking and cleaning (I was up since 4:00am and was on my feet non-stop till midnight) I baked 3 cakes (one of which was a disaster) and cooked 2 dishes and a salad. Three cakes and 2 dishes sound very doable on paper but in real life, it takes up a lot of time especially when you have other stuff to take care of.

Anyway, after a while, the hard parts of the cake softened a little and after applying the chocolate icing and topping with the roasted hazelnuts, I was very hopeful. The cake looked very presentable but I had to cut a slice to taste before the guests arrived. And I did just that. The cake would not look so nice with a slice missing but this is family and they wouldn't mind.  And what a relief that the cake tasted very good. It was moist and the combination of freshly roasted hazelnuts with the thick chocolate ganache was simply heavenly!


The cake was very well received with rave reviews from my mum. Thank you mummy! And my very sweet young nephew gave me a score of 100% for the cake. My little niece however, gave it a 99% percent score because she doesn't like nuts. Cute, huh?

Nutella Cake
Recipe source : nigella.com
(My notes and adaptations in red)

Ingredients :

For the cake :
- 5 large eggs (separated)
- 1 pinch of salt
- 125 grams soft unsalted butter
- 400 grams Nutella (1 large jar)
- 1 tablespoon Frangelico (or rum or water)
- 100 grams ground hazelnuts
- 100 grams dark chocolate (melted)

For the icing
- 100 grams hazelnuts (peeled weight)
- 125 ml double cream (I used whipping cream)
- 1 tablespoon Frangelico (or rum or water)(I used rum)
- 125 grams chocolate

Method :

1. Preheat oven to 180C (I used 160C)
2. In a large bowl, whisk the egg whites and salt until stiff but not dry. (I prepared the egg yolk batter first before whisking the egg whites)
3. In a separate bowl, beat the butter and Nutella together and then add Frangelico (or water or whatever you are using), egg yolks and ground hazelnuts.
4. Fold in the cooled melted chocolate, then lighten the mixture with a large dollop of egg white, which you can beat in as roughly as you want, before gently folding the rest of them in a third at a time.
5. Pour into a 23cm/9 inch round greased and lined springform tin and cook for 40 minutes or until the cake's beginning to come away at the sides, then let cool on a rack. (I baked the cake for 50 minutes)
6. Toast the hazelnuts in a dry frying pan until the aroma wafts upwards and the nuts are golden brown in parts : keep shaking the pan so that they don't burn on one side and stay too pallid on others. (I roasted the hazelnuts by baking them in the oven without preheating at 180C for 15 minutes and left them in the oven for another 15 minutes to bake on residual heat)
7. Transfer to a plate to cool. This is imperative : if they go on the ganache while hot, it'll turn oily. 
8. In a heavy bottomed saucepan, add the cream, liqueur or water and chopped chocolate, and heat gently. Once the chocolate's melted, take the pan off the heat and whisk until it reaches the right consistency to ice the top of the cake. (I put cream, rum and chocolate into a stainless steel bowl and used the double boiler method)
9. Unmould the cooled cake carefully, leaving it on the base as it would be too difficult to get such a damp cake off in one piece. (My cake was hard in the beginning and I was able to get it off the base to remove the baking paper on the base of the cake)
10. Ice the top with the chocolate icing and dot thickly with the whole, toasted hazelnuts. If you have used Frangelico, put shot glasses on the table and serve it with the cake.


I'm linking this post to Cook Like a Star, an event organized by Zoe of Bake for Happy Kids and co-hosted this month by Anuja of Simple Baking and Joyce of Kitchen Flavours. The featured chef for the month is Nigella Lawson.


Photobucket

This post is also linked to the event, Little Thumbs Up organised by Zoe of Bake for Happy Kids and Doreen of My Little Favourite DIY and hosted by Baby Sumo of Eat Your Heart Out

Friday 23 August 2013

Fried Spaghetti with Oriental BBQ Sauce


I ran out of ideas what to cook. I was on detox and my creative juices were drying up. It was salads for the first two days and a mish mash of other dishes for the next two days. I spotted a half bottle of Lee Kum Kee Spare Rib Sauce in the fridge and that gave me an idea.


There was a packet of organic pasta lying on my kitchen rack for more than a year. I checked the expiry date and it said best before 13 October 2013. Oh! That is very close isn't it? And I had a green capsicum in the fridge, the odd one out leftover from my Flamenco Eggs. And then there was this head of cabbage I bought a week ago. Good thing cabbage keeps well. There was also a stick of carrot that was going soft.


I used thinly sliced pork loin for this pasta dish as that was what I had. I seasoned the meat with a tablespoon of the spare rib sauce overnight just to speed things up when I want to cook. The next day, it was just a matter of putting everything together. I would say that it tasted pretty good with a generous sprinkling of black pepper and some tomato sauce.


Fried Spaghetti with Oriental BBQ Sauce
Recipe source : Phong Hong's concoction
Serves 4 big eaters :)

Ingredients :
- 350 grams pork loin (or chicken fillet), thinly sliced and seasoned with 1 tablespoon of Lee Kum Kee Spare Rib Sauce
- 1 packet spaghetti (500g)
- 2 big onions, thinly sliced
- 4 cloves garlic, minced
- A few leaves of cabbage, torn into smaller pieces
- 1 green capsicum, thinly sliced
- 1 small carrot, thinly sliced carrots

For seasoning (please adjust according to your taste) :
- 2 tablespoons Lee Kum Kee Spare Rib Sauce
- 2 tablespoons tomato sauce
- 2 tablespoons light soya sauce
- black pepper

Method :
1. Cook the spaghetti according to packet instructions and set aside.
2. While the pasta is boiling, heat oil in wok and saute the onions until wilted.
3. Add garlic and continue to fry until fragrant.
4. Add meat and fry until the meat is cooked.
5. Add sliced capsicum, carrots and cabbage. Fry for a short while until cabbage is soft.
6. Add spaghetti and seasoning and mix everything evenly.
7. Taste and adjust seasoning.
8. Lastly, add a few dashes of black pepper and mix well.
9. Serve immediately.

Wednesday 21 August 2013

A Failed Salad


Every once in a while I try a recipe that is out of my comfort zone and occasionally discover that I don't like a particular dish. There is absolutely nothing wrong with the recipe, just that it does not suit my taste.

Take this Indian Marinated Chicken Salad as an example. Generally speaking, I dislike plain yoghurt or any dressing made with yoghurt. Except for the one time when I had a Middle Eastern salad at Tarbush Restaurant in Jalan Bukit Bintang with my auntie and brother. The salad dressing was made with yoghurt and lemon juice and it tasted quite good.


I wanted to try this Indian Marinated Chicken Salad because it sounded delicious, especially the chicken part of the deal. The dressing, I wasn't so sure but never try, never know right?

The recipe calls for watercress and I was pretty sure it is not the variety that we use to cook soup. Therefore I decided to substitute with peasprouts. I have only tasted zucchini once and though not very impressed with the taste, I wanted to give it another chance.


Preparation of the salad does take a bit of effort. I don't like chicken breast and opted for deboned chicken legs instead.  And yes, yours truly struggled quite a bit with the deboning. Then the chicken is marinated and later pan fried.

The dressing requires toasting and pounding of cumin and fennel seeds which wasn't that hard because I used a mill. Then it is mixed with yogurt and lemon juice. Funny thing is  that the recipe did not mention salt for seasoning for both the chicken and dressing. I guess it must have been left out and of course, I added the salt.


To prepare the salad, the chicken is first pan fried in a hot heavy based pan. After that, it is removed and the zucchini is fried till slightly brown and transferred to a mixing bowl. Since I don't have watercress, I proceeded to briefly fry the peasprouts as I can't accept the taste of raw peasprouts.

I sliced the chicken and tossed it into the bowl together with the zucchini, peasprouts, diced tomatoes and corriander leaves. Next up was to toss everything with the yoghurt dressing.


Moment of truth. Nope, I did not like the dressing. Too exotic for me. But I ate the salad anyway, not wanting to waste my ingredients and effort. All was not lost as the chicken tasted very good. Which leads me to my next post - Garam Masala Roasted Chicken. Coming soon!

There is no recipe for today as I won't share what I don't like over here. Oh well, at least now I know for sure to trust my palate. No more yoghurt based dressings for me from now on. But I must qualify myself here. I do eat Indian raita  - a simple cucumber salad with yogurt but it must be accompanied with curry for me to drown out the yoghurty taste hah! hah!


In Cantonese they would say "Ho thye erm ho sek".

Sunday 18 August 2013

Braised Pork Trotters Bee Hoon


The other day I was reading about the SK-II Facial Treatment Mask at Shirley's Luxury Haven. Shirley (I assume it is you Shirley, can't be too sure with the mask on) looked so relaxed soaking in the tub with bubbles modestly covering her up to her chin. I can't afford this SK-II stuff, which many women swear by. But I have tried the Cosway face mask courtesy of my mum. I find it very refreshing and cooling and it does leave your skin feeling hydrated and soft.


However, if you are putting on the mask at night, please be careful. Especially if you are short sighted like me. One evening, after taking off my contact lenses, I put on the face mask. It is this wet white thing with holes cut out for eyes, nose and mouth so that you can see, breathe and talk (or eat?).  After putting on the mask, I decided to read and put on my glasses. 

After settling on my bed for 10 minutes, I decided to get up to get something from my dressing table. And I almost fainted. Looking back at me was this white faced woman with messy hair and thick specs. That was me in the mirror and I had forgotten that I had my face mask on. LOL! What a major fright! I did look rather ghastly - white face with cut out eyes, nose and mouth with a shock of messy hair. My specs made it even scarier. And it didn't help that I love watching horror flicks like the Japanese movie, Slit Mouthed Woman. So, please yah? Don't frighten yourself or worse, your husband or your kids :) 


What has all this got to do with today's dish? I read an article here that says pig's trotters are an anti-aging food due to it's collagen content. I don't know how true that is but for those of us who love our trotters, it is cause for celebration. My Mum and I are smiling from ear to ear. If there ever was two of the biggest pig trotter fans, it's us mother and daughter. My mum and I love pork belly too, the fattier the better :)

Anyway, speaking of pork trotters, my auntie once told me that it is nice to fry bee hoon with canned pork leg. I am not too keen on canned food except for baked beans, tuna and the occasional green peas or button mushrooms. I absolutely abhor canned chicken curry, so of course I was skeptical.


Then I saw Annie's Pig Trotters Bee Hoon and shortly after Alvin's Braised Pig Trotters Bee Hoon. Both my friends described this dish as "Heavenly" and one of them (you know who) does all this fine dining dishes like Sous Vide Duck Breast with Balsamic Honey Sauce and if he says canned pork trotters bee hoon is heavenly, then you better pay attention.


I bought two cans of this after tasting the yummy bee hoon.
It so happened that I was at the pork shop with my partner and he picked up a can of Narcissus braised pork belly (they have all sorts even braised pork ribs) and he told me his mum used to fry bee hoon with canned pork and it was delicious. That was the deciding factor for me. The following weekend, I cooked us a big wok of braised pork belly bee hoon, a first for me. It was delicious! And I am now a believer. I have a feeling my mum and my auntie will ask me to cook this bee hoon for them this weekend :) By the way, the pickled green chillies are on standby in the fridge, just in case.


Braised Pork Trotters Bee Hoon
Recipe source : Chef and Sommelier
Serves 4
(My adaptations and notes in red)

Ingredients :
- 1 packet bee hoon (400g)
- 2 cans Narcissus pork leg with mushrooms (I used the canned pork belly because that was what my partner bought)
- 300g chye sim 
- 3 to 4 cloves garlic, minced (I used 6 cloves)
- 1 tablespoon cooking oil (I used more than 1 tablespoon)

Sauce ingredients :
- 1 tablespoon oyster sauce (I used 2 tablespoons light soya sauce because my partner does not like oyster sauce)
- 3 tablespoons dark soya sauce
- 2 tablespoons Chinese cooking wine
- 2 teaspoons fish sauce (I used 2 tablespoons)
- pepper
- 500ml chicken stock or hot water (I just added as much water as needed to braise the bee hoon)

Method :

1. Soak bee hoon in water until softened, about 30 minutes. Drain and set aside.
2. Mix all ingredients for the sauce. Stir well and set aside.
3. Heat up oil in wok and stir fry the garlic until fragrant without browning.
4. Empty the cans of pork trotters into the wok.
5. Keep frying and break up the trotters into bite sizes.
6. Pour in the sauce mixture, turn up heat and bring to a boil.
7. Add the bee hoon and stir well to ensure the noodles are well coated with the braising liquid.
8. Cover the wok with a lid and braise the noodles on high heat for about 10 minutes or until noodles are cooked.
9. In between, give the noodles a slight toss to ensure even braising throughout.
10. Do not allow the gravy to dry up. Add hot water as required.
11. Just before noodles are cooked, add the vegetables and mix well.
12. Continue braising until both noodles and vegetables are cooked.
13. Sprinkle home made crispy fried shallots over the noodles (I was too lazy to fry the shallots but will not miss this step when I cook this again).

Thursday 15 August 2013

Oriental Style Chicken Salad


I told you this story before here about a ready made salad dressing that came with a packet of ready washed salad leaves. The dressing was very tasty and I checked the ingredients listing but it wasn't very helpful.


This dressing that I recreated was the first prototype and it tasted good though I could not get the exact taste as the ready made one. But it had all the elements of sweet, sour and salty, which is what I love in a good salad dressing.


The recipe below is good for 4 servings and since it's something I made up, you can always make your own adjustments to suit your own taste. I used my Chilli Bean Sauce Roasted Chicken in the salad but you can also use any Chinese style roasted or even steamed chicken.


Oriental Style Chicken Salad
Recipe source : Phong Hong as inspired by a store bought dressing

Salad ingredients :
- Mixed salad greens
- Carrots, grated
- Cucumbers, sliced
- Tomatoes, sliced
- Alfalfa sprouts
- Coriander leaves (cilantro)
- Spring onions, chopped
- Chicken meat, shredded

Dressing (Good for 4 servings) :
- 2 big cloves garlic (pounded)
- 1/2 inch ginger (pounded)
- 2 tablespoons honey
- 3 tablespoons bean paste (taucheow)
- 1 tablespoon dark soya sauce
- 1 teaspoon plum sauce
- 200ml rice vinegar
- 100ml water

Additional ingredients for salad dressing :
- Sesame oil
- Grapeseed oil or any neutral tasting oil

For garnishing :
- toasted sesame seeds.

To make dressing :
- Pound garlic and ginger (or run through garlic press)
- In a saucepan add garlic, ginger, honey, bean paste, dark soya sauce, plum sauce, vinegar and water.
- Bring the dressing to a boil and lower heat to simmer for 10-15 minutes until marinade is slightly thick.
- Take it off the heat and cool.

To serve :
- Put salad ingredients into a mixing bowl.
- In another bowl, mix 2 tablespoons of dressing with 2 tablespoons of grapeseed oil (or any neutral tasting oil) and 1 teaspoon sesame oil.
- Pour dressing into salad ingredients and toss to mix well.
- Sprinkle with toasted sesame seeds.