Friday, 28 December 2012

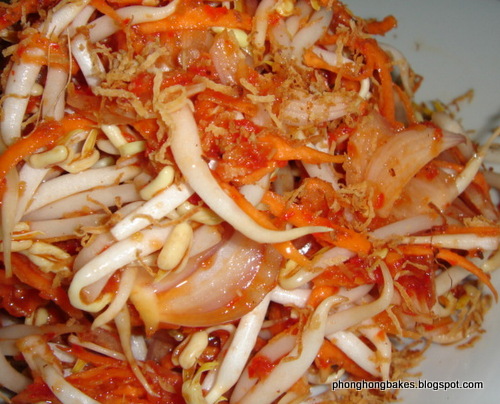
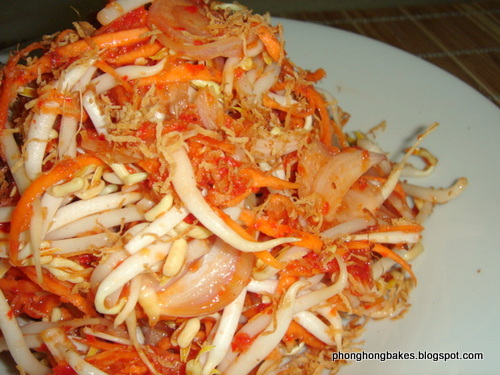
Beansprout Kerabu (Kerabu Taugeh)


When I was a kid, taugeh (beansprouts) was my biggest enemy. I used to think that taugeh was the worst food ever. My grandpa even tricked me once when he put taugeh into my Maggi mee (noodles). "That's actually mee. The manufacturer made them look like taugeh. Eat.", grandpa said convincingly. That was the pre-internet era when kids were easily fooled. And I gingerly tried the soggy taugeh and though it didn't taste that bad, I still avoided it like the plague.


I mean, how could anybody like taugeh? It had a weird smell and to top that off, grandma used to make me help remove the tails. There must have been thousands of taugeh in the basin to be de-tailed and it was such a tedious job. I would rather be sitting in front of the TV watching Ultraman wrestling with the raksaksa (monster). When I gained independence (Merdeka!) I decided that there is no harm eating the tails. And thus began my love affair with the taugeh.


I love taugeh simply fried with garlic and salt, or if I am having rojak, I love it raw. No blanching for me. I want my taugeh crunchy. I also love raw taugeh with Chenh. And now I love kerabu taugeh. The dressing is the usual sambal belachan recipe, and there are some recipes which add kerisik to the dressing. I have tried that but I prefer to sprinkle the dry fried coconut (without pounding) over the kerabu. This kerabu is great served with keropok (fish crackers) or fried fish. 


This dressing had kerisik in it. I prefer it without.

The recipe I am sharing comes from Kak Liza's "Senangnya Memasak ...... Kerabu & Salad".


Beansprout Kerabu (Kerabu Taugeh)
Recipe source : Chef Hanieliza

Ingredients :
- 300g beansprouts (washed and drained)
- 50g carrots (grated)
- 1/2 cup dry fried grated coconut, pounded (I did not pound)
- 1 big onion, thinly sliced

For dressing :
- 5 red chillies
- 6 bird's eye chillies (I omitted)
- 2cm belacan (shrimp paste)
- 2 tablespoons dried prawns
- 1 tablespoon tamarind juice (asam jawa)

- Juice from 6 kalamansi lime/limau kasturi (I used lime/limau nipis)
- 1 tablespoon fish sauce (or to taste)
- 1 teaspoon sugar
- Salt to taste (I omitted)

Method :
- Put vegetables into mixing bowl and add dressing. Toss to mix well.
- Sprinkle grated coconut and serve immediately.
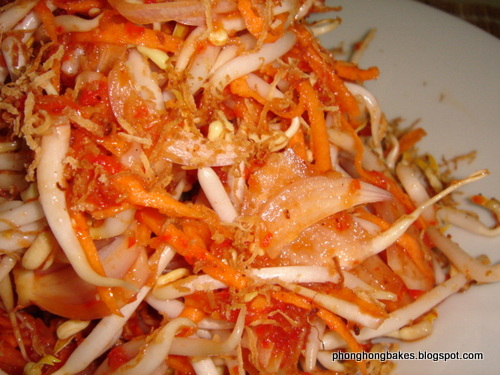

Tails in all its' glory!

Tuesday, 25 December 2012

Merry Christmas and Awards (Update)

This is an update to thank Alvin of Chef and Sommelier for nominating me for the Liebster Award. Thank you, Alvin! I did not do a new post because this auntie has no energy :(

Merry Christmas to all my friends and readers! The new year is just around the corner and my hope is that 2013 will bring  good things to all of us like good health, happiness, peace, strength, determination, hope and many more. Of course in our life, the not so good things will happen too. But with a good attitude, strength, resolve and faith, we should be able to overcome them.

Today, I would like to take the opportunity to thank my friends who have passed on to me the following awards :


To PTR. PunithaJessie and Amelia, thank you very much and this acknowledgment is long overdue as you guys passed on the awards to me in July and August 2012. 

And to mui mui, thank you very much, this is like a Christmas present for me :) To Alvin, thank you for the early New Year present hah! hah!

The reason I took so long to acknowledge the first 4 awards is because I am a low key person, not given to announcing achievements and such. But on the other hand, after much thought, I did not want my friends to get the impression that I did not appreciate their nomination. I am very much humbled and grateful for the thought and recognition. It means a lot to me. Once again, thank you from the bottom of my heart.

The awards require me to pass them on to a limited number of friends and it is hard for me to single out among my many sweet and talented friends. And some of my friends have made their blogs an award free zone. So, with much apologies, I am breaking the rules and passing out the awards to all my friends! That's right, breaking the rules just like how I like to meddle with other people's recipes hah! hah!

Having said that, I will fulfill the other requirements here. The Versatile Blogger Award requires me to state 7 things about myself. The ABC Award requires 26 things about me from A to Z and that's really a lot! I will only go for the 7, so here goes :

1. I can eat a regular pizza all by myself and still have room for dessert.
2. I love housekeeping, I find it relaxing.
3. My favorite cuisine  is Indian.
4. I don't like ironing.
5. When it comes to noodles, kueh teow and meehoon must be fried and mee is for soup.
6. I can put on 5lbs in one week (serious, no joke) and take forever to lose it.
7. I take my drinks cold, including my coffee for breakfast.

So there you have it, 7 things about Auntie Phong Hong.

And finally, for the Liebster Award, mui mui has set these questions for me and my answers are in red :

  • breakfast, lunch, dinner or supper. Dinner
  • strawberry or blueberry. Blueberry
  • seafood or poultry. Poultry
  • benefit most in blogging. Motivate me to try new recipes
  • your favourite drink. Ice cold water
  • your favourite cook book. Simply Sedap by Chef Wan
  • a recipe e-book or a recipe paper book. Recipe paper book
  • what is your  favourite dish for Christmas. Potato salad
  • what your all time favourite song. Allentown by Billy Joel
  • chinese food or japanese food. Japanese
  • what your choice of colour. Green

And my answers to Alvin's questions :

Cooking or Blogging? Cooking AND Blogging
Your favourite Chef/Restaurant? Chef Wan
Three favourite ingredients? Eggs, Onions and Garlic
Three ingredients that you would avoid? Any cheese other than cheddar, milk and shellfish
Breakfast, Lunch or Dinner? Dinner
Coffee or Tea? Coffee
Cakes or Cookies? Cakes
Butter or Olive Oil? Olive Oil
Red or White (Wine)? Red
Which three famous individuals would you invite to dinner (dead or alive)? Chef Wan, Chef Florence Tan and Chef Amy Beh
If you were to have your last meal, what would it be? Fried eggs with Terengganu kayciap


It has been fun blogging and getting to know my fellow bloggers. I have learnt a lot from all of you and  I wish you all a blessed and wonderful Christmas and a Happy New Year!

Saturday, 22 December 2012

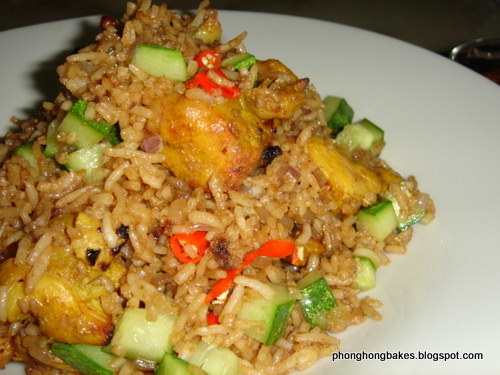
Satay Fried Rice


I had 8 sticks of leftover satay in the freezer including a little bit of the satay gravy. I also had some frozen rice, brought forward from a recent family gathering. Sounds like a perfect situation to make fried rice :)

Defrosted rice and satay.

I didn't need any special seasoning as the satay will contribute lots of flavor to the rice. All I needed was some onions and garlic. I also added diced cucumbers and cili padi for additional oomph!

Diced onions, chopped garlic, sliced cili padi and diced cucumber.

It was very delicious and I highly recommend that you try it if you have any leftover satay. Or why not buy some satay to cook this fried rice?


You can just go by your own estimates. My recipe below is just a guide :)


Satay Fried Rice
Recipe source : Phong Hong's concoction

Ingredients :
- 2 cups overnight cooked rice
- Meat from 5 sticks of chicken satay
- 1 big onion, diced
- 1 large clove of garlic, chopped
- 2 cili padi, sliced
- some diced cucumbers
- 1 tablespoon kicap manis (sweet soya sauce)
- 1 tablespoon fish sauce

Method :
1. Heat oil in frying pan and saute onions until translucent.
2. Add garlic and stir for 30 seconds.
3. Add satay meat and fry until heated through.
4. Add rice, kicap manis and fish sauce.
5. Fry until rice is well incorporated with ingredients.
6. Add cili padi and diced cucumbers and mix well.
7. Serve with some satay sauce.


And you can also top with a fried eggs to make it extra special. I will definitely cook this fried rice again as it was very tasty. Hmmm.....I'll go and buy some satay one of these days.


Friday, 14 December 2012

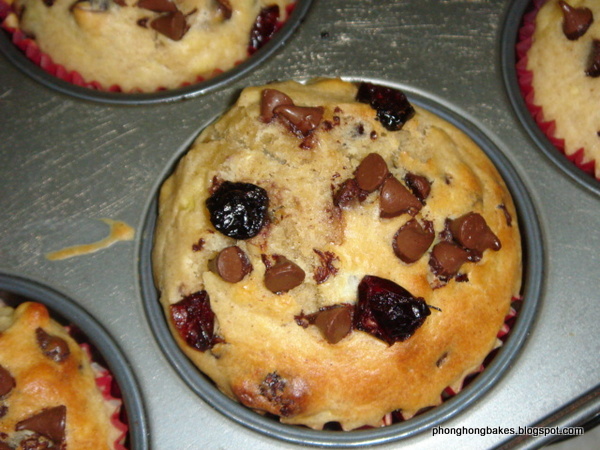
Banana Chocolate Chips and Mixed Berries Muffins


I was inspired to bake these muffins when I came across Sunsweet's Berry Blend at Tesco. I have a weakness for anything berries and cherries. They are so attractive.


Too bad these fruits are very expensive here. And these dried ones don't  come any cheaper at RM19.99 for a 142gram packet.


The muffins I baked have been adapted from Joy of Baking's Banana Muffins and Chocolate Chip Muffins recipe. That was where I first learnt to bake and I find it useful that there is a video demonstration for most of the recipes. And I like Stephanie Jaworski as she is pleasant and her instructions are clear and easy to follow especially for beginners like me.


Batter before baking. I like to sprinkle extras on top.

What I like about muffins is that you only need two mixing bowls, one for the wet and the other for the dry ingredients.   And there is no need for creaming of butter and sugar unlike cupcakes. And they don't need to be frosted, perfect for lazy me :) I tend to like mixing the sugar into the wet ingredient so that it dissolves and is more evenly distributed in the batter.


Just out of the oven.

Another thing I picked up is that using buttermilk produces fluffier muffins. So when I see a recipe that calls for milk, I substitute it with buttermilk, that is if I have it on hand. I get my buttermilk from Tesco but sometimes they are out of stock.


My favorite muffin is banana and chocolate chips because the combination of bananas and chocolate is simply delicious. And so I thought why not add some dried berries to jazz it up a bit. 


I liked the sweet and tangy taste the berries brought to the muffin and it complements the bananas and chocolate chips very well.


Banana Chocolate Chips and Mixed Berries Muffins
Recipe Source : Adapted from Joy of Baking
Makes 12 regular sized muffins.

Ingredients :
- 230grams self raising flour
- 1/2 cup chocolate chips (and some extra for topping)
- 1/2 cup dried mixed berries (and some extra for topping)

- 1/4 cup brown sugar
- 1/2 teaspoon ground cinnamon
- 2 large eggs, lightly beaten
- 1/2 cup grapeseed oil (or any vegetable oil)
- 1 cup buttermilk
- 2 medium sized bananas, mashed
- 1 teaspoon vanilla extract

Method :
- Preheat oven to 180C (I use 160C)
- Line muffin pans with paper liners.
- In a mixing bowl add flour, chocolate chips and mixed berries. Stir to coat chocolate chips and mixed berries with flour (this will prevent them from sinking to the bottom of the batter)
- In another mixing bowl add sugar, ground cinnamon, eggs, grapeseed oil, buttermilk, mashed bananas and vanilla extract. Stir to mix.
- Pour the wet ingredients into the flour mixture and lightly fold until just combined. Do not over mix.
- Scoop batter into lined muffin pans and top with extra chocolate chips and dried berries.
- Bake for about 20 to 25 minutes.

Note : Check at 20 minutes by inserting a toothpick into center of muffin. If it comes out clean it is done but if there is batter sticking to it, continue baking and check every 2 minutes to prevent over baking. My muffins were done after 22 minutes.


I stashed a few of the muffins in the freezer for later. Would be convenient when I get a snack attack. Just pop them from the freezer into the microwave and zap for 1 minute or more.


Very moist and tatsy.

Wednesday, 12 December 2012

Eggs Poached in Tomato Sauce (Shashuka)


When I saw this recipe on Shannon's blog I just could not wait to try it. Never mind that I didn't have all the ingredients required. Eggs, I have for sure, that's my main breakfast food and an important ingredient for baking. I vaguely remembered the three tomatoes including some cherry tomatoes sitting in the fridge.

Upon further investigation, gasp! The three tomatoes had already "expired" but the cherry tomatoes were fine. As I was very determined to cook Shashuka, I decided to go ahead albeit modifying the recipe a little bit.

My ingredients. Not enough tomatoes.

I also did not have green capsicum and I left that out. Instead, I substituted it with cili padi (bird's eye chillies). And oops, instead of slicing the big onions, I diced it. I should have checked the recipe again. I also left out the oregano because I did not have any and substituted tomato paste with some tomato ketchup.

I love the colour!

I must say that this dish is very flavorful and aromatic. And it was absolutely delicious. It made for a very hearty meal. I had it for breakfast and I was very pleased. The only thing is that my Shashuka didn't look as beautiful as Shannon's. There wasn't enough tomatoes and the eggs kind of took up  a lot of space in the pan and drowned the tomatoes :(


The tomatoes didn't stand out and was flooded with eggs.

And I also made the mistake of cooking the eggs for too long. The yolks are supposed to be soft cooked.

The yolks were overcooked. Sigh.....

For anyone who loves eggs, make this dish. It's good for breakfast or lunch. Or even dinner. It is good either on it's own or with toast.


Eggs Poached in Tomato Sauce (Shashuka)
Recipe Source : Just as Delish

Ingredients :
- Olive Oil
- 1 big onion, sliced
- 4 garlic cloves, chopped
- 600g (about 4 large) ripe tomatoes, roughly diced 
- 1 small green capsicum, roughly diced
- 100ml tomato paste
- 4 large eggs 
- 1 teaspoon Paprika powder
- 1 teaspoon Cumin powder
- a pinch of Oregano/Thyme
- Sea salt and freshly cracked Black Pepper to taste
- Parsley for garnish

Method :
- In a medium frying pan, add olive oil and fry onions until translucent.
- Throw in garlic.
- Add tomatoes and cook for 5 minutes.
- Add in the rest of the ingredients except parsley and eggs. Cook for 15 minutes on low flame. If it is dry and sticks to the pan, add some water and mix well. Shahshuka is supposed to be dry, not watery.
- Season with salt and pepper to taste.
- Minutes before serving, make 4 gaps in the vegetable mixture and crack in the eggs, one at a time.
- Cover the pan and cook on low flame for 5 minutes. The egg yolks shoudl not be hard but soft cooked, so be careful not to overcook the eggs.
- Garnish with parsley and serve immediately with bread or just on it's own.


Friday, 7 December 2012

Avocado and Chicken Salad


Ever since my first acquaintance with the avocado, I am now mad about avocados! My next avocado dish is a salad with steamed chicken. I made a dressing with lemon juice and red wine vinegar and it was totally delicious. The creamy avocado made for an indulging mouth feel and I simply cannot get enough!


Avocado and Chicken Salad

For the salad
- 1 ripe avocado, sliced
- 1 cucumber, sliced
- 8 cherry tomatoes, cut in half
- 1 carrot, grated
- 1 cup alfalfa sprouts
- some pineapple slices
- Corriander leaves
- Steamed chicken, shredded

Dressing
- Juice from 1 lemon
- 1 tablespoon red wine vinegar
- 1 teaspoon honey
- 1 clove garlic
- 1 teaspoon black peppercorns
- Salt to taste
- 2 tablespoons extra virgin oil
- 1 teaspoon sesame oil

For the dressing :
- Pound garlic with salt and peppercorns.
- Add lemon juice, red wine vinegar, honey and olive oil.  Stir to mix,

To assemble the salad :
- Put all vegetables and chicken into a mixing bowl.
- Pour in dressing and toss.

Note : A sprinkling of toasted sesame seeds would add a nice touch.


Sunday, 2 December 2012

Ayam Golek Gaya Pahang (Pahang Style Spicy Grilled Chicken)


I've cooked Ayam Golek before and I realize that there are a few variations of this dish within the states in Malaysia. There is the Kelantan style and Terengganu style. And when I came across the Pahang version, I thought it would be perfect  to try it and submit to Malaysia Food Fest Pahang.

I am again using Ms Betty Saw's recipe from Rasa Malaysia. The ingredients are pretty much similar to the ayam golek I cooked previously except that the method is slightly different and curry powder is added to the spice paste. The chicken is first marinated with tumeric powder and salt and then grilled before basting with the spice paste. 


Chicken marinated with tumeric and salt and the spice paste ingredients.

The spice paste is cooked separately and I find that the curry powder adds a different dimension to this dish.The ayam golek turned out delicious, however I find the addition of one tablespoon of sugar a little too sweet for my liking. If I cook this dish again, I would leave out the sugar. 


Spice paste cooked over the stove.

Serve the ayam golek with plain rice and some cucumber acar. And be sure to be generous with the spice paste. It is the spice  paste that carries this dish and makes it so super delicious. 


My favorite chicken part, the whole leg.

Not a difficult dish to cook, just spend a little time peeling the onions and chuck the spice paste ingredients into the blender. After that, add in the other components and simmer away. Try this over a weekend, you will not regret it. This dish also freezes well.


Ayam Golek Gaya Pahang
Recipe source : Rasa Malaysia by Betty Saw (Bahasa Malaysia version, page 134)
My adaptations are in red.

Ingredients :

- 1 whole chicken, about 1.5kg cut into halves and scored at back and thighs (I cut into quarters, no scoring)
- 2 teaspoons salt
- 1 teaspoon tumeric powder or 2.5cm fresh tumeric, pounded (I used 2 teaspoons)
- 1.5 tablespoons meat curry powder (I used 1 whole small packet of Baba's meat curry powder)
- 1 tablespooon sugar (I will omit this in my next attempt, too sweet for me)
- 1 teaspoon salt (to add to blended spice paste)
- 1/2 teaspoon seasoning powder (I omitted)
- 2 small pieces asam gelugur/asam keping
- 500ml thin santan, squeezed from 1 grated coconut with adequate water (I mixed 200ml packet santan with 250ml water)

Blended Ingredients :
- 25 dried chilles, soaked (I used 15 dried chillies, deseeded)
- 300g shallots
- 2 stalks lemongrass
- 1.25 x 1.25cm ginger

To garnish (I omitted)
- Salad leaves
- Tomato
- Cucumbers
- Red Chillies

Method :
- Marinate chicken with salt and tumeric for 15 minutes.
- Mix blended ingredients, curry powder, sugar, salt, seasoning powder, asam gelugur and santan in a saucepan and simmer over low heat until thick.
- Grill chicken for 15 to 20 minutes until both sides are brown and cooked (I grilled in the oven at 180C for 15 minutes)
- Spoon the gravy onto chicken and continue to grill for 5 minutes until fragrant and oil rises to the top (After grilling the chicken for 15 minutes, I kept basting the chicken generously every 10 minutes for another 30 minutes until the chicken is cooked and gravy is thick and slightly browned).
- Serve and garnish with with salad leaves, tomatoes, cucumber and red chillies.


I am submitting this post to Malaysian Food Fest, Pahang Month hosted by WendyinKK of Table for 2.....or more.

Wednesday, 28 November 2012

Mango Yogurt Cottony Cake


This is a really light and soft cake. The texture, as it's name suggests, is cottony soft. This recipe comes from Kimmy of Cooking Pleasure with slight adaptation of her Mango Yogurt Cottony Cake recipe. I have been a follower of Kimmy's blog and I love her souffle cakes and home style recipes. She also has quite a number of bread and bun recipes which I am very eager to try.

I was quiet impressed with this recipe as it is so simple and  yet it yields a really light and delicious cake. The sweetness is just nice and takes into account the sweetness that comes from the fruit yogurt.
All the ingredients.
The first time I attempted this cake, I used peach flavoured yogurt. After 45 minutes of baking time, I checked and the top had already browned. I tested the cake with a skewer and noted that my cake was already done. Kimmy's baking time is 70 minutes so it is best to check and adjust as our ovens behave differently.

I left the cake in the pan a bit to long after it was inverted and the bottom became a bit wet. I felt that an 8 inch pan is a bit too small, the batter rose up quiet high and the centre of the cake  really bulged up in the oven.
Cake pan lined with parchment paper.
I loved this cake so much that I baked another one the following week. This time round, I used a 9 inch deep cake pan. I also lined the pan with parchment paper for easy removal. The cake was done in 45 minutes and the top was slightly over browned. And like the first time, the cake was so soft and fluffy that if I had my way, I would have eaten at least another 4 slices hee..hee...

Cake inverted on cooling rack. The middle part
does sink a bit.
Last weekend I attempted this cake again, this time using mango yogurt just like Kimmy's original recipe. I decided to reduce the oven temperature as I think my oven is too hot. I baked the cake at 140C and it was done in 55 minutes. The top was nicely browned and this time I lined the cooling rack with parchment paper before inverting the cake. Bad idea. 

Some spots peeled off with the parchment
paper. So don't line the cooling rack.

Some parts of the cake got stuck to the parchment paper and peeled off together with the paper after the cake was cooled.  After inverting the cake, let it cool for about 10 minutes before peeling off the parchment paper. If not, you will end up peeling off some of the cake like I did :( And be patient, slice the cake after it has cooled completely. I was too quick to cut the cake and did not get neat clean cuts :(

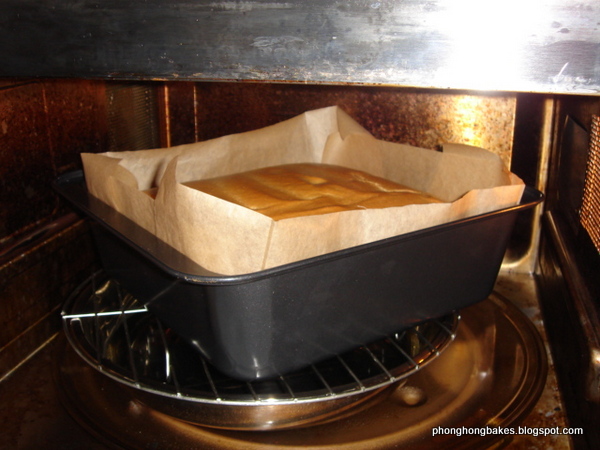
This cake has to be steam baked and I used the method that Kimmy mentioned in this post.

Put hot water in a tray and place rack over 
the tray.
Place cake tin on the rack. This photo was
taken after cake was baked.

I highly recommend this cake and it is now on my regular baking list. I am reproducing Kimmy's recipe below with my adaptations in red. 

Mango Yogurt Cottony Cake
Recipe from : Cooking Pleasure

Ingredients :
Egg Yolk Mixture
- 65g superfine flour (sifted)
- 1/4 tsp salt (I omitted)
- 5 egg yolks
- 1 whole egg
- 45 ml corn oil
- 80ml mango yogurt (I used the whole tub of 135ml)
- 1 tsp lemon juice (I omitted)

Egg White Mixture
- 5 egg whites
- 1/2 tsp cream of tartar (I used 1/4tsp)
- 65gm castor sugar

Method :
For egg yolk mixture :
- Place the dry ingredients in the mixing bowl and make a well in the centre.
- Add in eggs, corn oil, lemon juice and yogurt.
- Using a paddle hook, beat ingredients until creamy and well combined.
- Set aside.
- Preheat oven at 160C for 10 minutes.
I mixed eggs, corn oil and yogurt using a whisk. When combined, I add sifted flour and mixed until just combined. I preheated my oven to 140C.

For egg white mixture :
- Using an electric mixer, whisk egg white until frothy, add in cream of tartar until slightly foamy.
- Add sugar in 3 batches. Whisk until soft to stiff peaks form. (I beat until stiff peaks)
 - Using a spatula, fold in 1/2 of the meringue into the egg yolk mixture. Lift and fold until well combined, then add in the rest of the meringue. Fold again until well mixed.
- Pour into a 8" square tin (line base with baking paper at the bottom only). Smooth the surface with a spatula and steam bake in oven at 160C for 70 minutes.
- Invert the cake after baking and let it cool before removing the baking paper.
- Cool cake before slicing to serve.

This is what I did :
- I folded 1/3 of the meringue into the egg yolk mixture to lighten it.
- Then I poured the egg yolk mixture into the balance of the meringue and folded using the only way I know how, my bare hand.
- I lined a 9" deep square baking pan and poured the batter in and smoothed the top.
- I baked for 55 minutes at 140C.

I have always mixed my egg white and egg yolk mixture  using my hand as it works best for me. I can never get it right using a spatula or whisk. If you are curious how it is done, you can check out the video below :


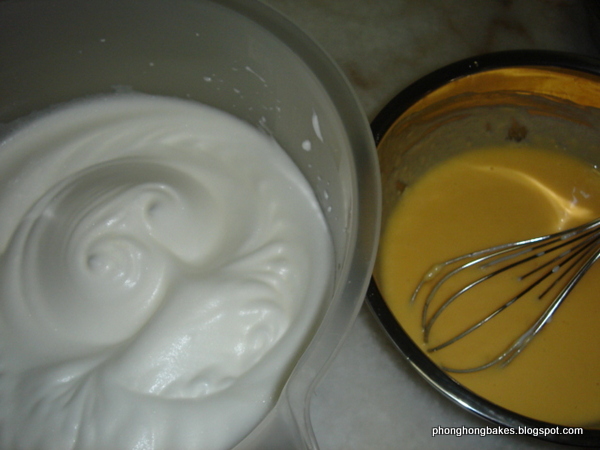
My egg yolk mixture, done using a whisk.
Egg white and egg yolk mixture.
Both mixtures mixed using my hand.
Pour batter into lined baking pan
I sliced the cake into thick squares.
Love the soft cottony texture. One or two slices is simply not enough.